在你的 Next.js 项目中集成 Mastra
🌐 Integrate Mastra in your Next.js project
在本指南中,你将使用 Mastra 构建一个调用工具的 AI 代理,然后通过从路由中直接导入和调用该代理,将其连接到 Next.js。
🌐 In this guide, you'll build a tool-calling AI agent using Mastra, then connect it to Next.js by importing and calling the agent directly from your routes.
你将使用 AI SDK UI 和 AI Elements 来创建一个美观且互动的聊天体验。
🌐 You'll use AI SDK UI and AI Elements to create a beautiful, interactive chat experience.
在你开始之前Direct link to 在你开始之前
🌐 Before you begin
创建一个新的 Next.js 应用(可选)Direct link to 创建一个新的 Next.js 应用(可选)
🌐 Create a new Next.js app (optional)
如果你已经有一个 Next.js 应用,可以跳到下一步。
🌐 If you already have a Next.js app, skip to the next step.
运行以下命令来创建一个新的 Next.js 应用:
🌐 Run the following command to create a new Next.js app:
- npm
- pnpm
- Yarn
- Bun
npx create-next-app@latest my-nextjs-agent --yes --ts --eslint --tailwind --src-dir --app --turbopack --no-react-compiler --no-import-alias
pnpm dlx create-next-app@latest my-nextjs-agent --yes --ts --eslint --tailwind --src-dir --app --turbopack --no-react-compiler --no-import-alias
yarn dlx create-next-app@latest my-nextjs-agent --yes --ts --eslint --tailwind --src-dir --app --turbopack --no-react-compiler --no-import-alias
bun x create-next-app@latest my-nextjs-agent --yes --ts --eslint --tailwind --src-dir --app --turbopack --no-react-compiler --no-import-alias
这会创建一个名为 my-nextjs-agent 的项目,但你可以用你想要的任何名字替代它。
🌐 This creates a project called my-nextjs-agent, but you can replace it with any name you want.
初始化 MastraDirect link to 初始化 Mastra
🌐 Initialize Mastra
导航到你的 Next.js 项目:
🌐 Navigate to your Next.js project:
cd my-nextjs-agent
运行 mastra init。出现提示时,选择一个提供商(例如 OpenAI)并输入你的密钥:
🌐 Run mastra init. When prompted, choose a provider (e.g. OpenAI) and enter your key:
- npm
- pnpm
- Yarn
- Bun
npx --force mastra@latest init
pnpm dlx --force mastra@latest init
yarn dlx --force mastra@latest init
bun x --force mastra@latest init
这将创建一个包含示例天气代理和以下文件的 src/mastra 文件夹:
🌐 This creates a src/mastra folder with an example weather agent and the following files:
index.ts- Mastra 配置,包括内存tools/weather-tool.ts- 一个用于获取给定位置天气的工具agents/weather-agent.ts——一个使用该工具的天气代理和提示
在接下来的步骤中,你将从你的 Next.js 路由中调用 weather-agent.ts。
🌐 You'll call weather-agent.ts from your Next.js routes in the next steps.
安装 AI SDK UI 和 AI 元素Direct link to 安装 AI SDK UI 和 AI 元素
🌐 Install AI SDK UI & AI Elements
安装 AI SDK 界面以及 Mastra 适配器:
🌐 Install AI SDK UI along with the Mastra adapter:
- npm
- pnpm
- Yarn
- Bun
npm install @mastra/ai-sdk@latest @ai-sdk/react ai
pnpm add @mastra/ai-sdk@latest @ai-sdk/react ai
yarn add @mastra/ai-sdk@latest @ai-sdk/react ai
bun add @mastra/ai-sdk@latest @ai-sdk/react ai
接下来,初始化 AI 元素。出现提示时,选择默认选项:
🌐 Next, initialize AI Elements. When prompted, choose the default options:
- npm
- pnpm
- Yarn
- Bun
npx ai-elements@latest
pnpm dlx ai-elements@latest
yarn dlx ai-elements@latest
bun x ai-elements@latest
这会将整个 AI Elements 用户界面组件库下载到一个 @/components/ai-elements 文件夹中。
🌐 This downloads the entire AI Elements UI component library into a @/components/ai-elements folder.
创建聊天路线Direct link to 创建聊天路线
🌐 Create a chat route
创建 src/app/api/chat/route.ts:
🌐 Create src/app/api/chat/route.ts:
import { handleChatStream } from '@mastra/ai-sdk';
import { toAISdkV5Messages } from '@mastra/ai-sdk/ui'
import { createUIMessageStreamResponse } from 'ai';
import { mastra } from '@/mastra';
import { NextResponse } from 'next/server';

const THREAD_ID = 'example-user-id';
const RESOURCE_ID = 'weather-chat';

export async function POST(req: Request) {
  const params = await req.json();
  const stream = await handleChatStream({
    mastra,
    agentId: 'weather-agent',
    params: {
      ...params,
      memory: {
        ...params.memory,
        thread: THREAD_ID,
        resource: RESOURCE_ID,
      }
    },
  });
  return createUIMessageStreamResponse({ stream });
}

export async function GET() {
  const memory = await mastra.getAgentById('weather-agent').getMemory()
  let response = null

  try {
    response = await memory?.recall({
      threadId: THREAD_ID,
      resourceId: RESOURCE_ID,
    })
  } catch {
    console.log('No previous messages found.')
  }

  const uiMessages = toAISdkV5Messages(response?.messages || []);

  return NextResponse.json(uiMessages)
}
POST 路由接受一个提示并以 AI SDK 格式流式返回代理的响应,而 GET 路由则从内存中获取消息历史,以便在客户端重新加载时能够恢复 UI。
🌐 The POST route accepts a prompt and streams the agent's response back in AI SDK format, while the GET route fetches message history from memory so the UI can be hydrated when the client reloads.
创建聊天页面Direct link to 创建聊天页面
🌐 Create a chat page
创建 src/app/chat/page.tsx:
🌐 Create src/app/chat/page.tsx:
'use client';

import '@/app/globals.css';
import { useEffect, useState } from 'react';
import { DefaultChatTransport, ToolUIPart } from 'ai';
import { useChat } from '@ai-sdk/react';

import {
  PromptInput,
  PromptInputBody,
  PromptInputTextarea,
} from '@/components/ai-elements/prompt-input';

import {
  Conversation,
  ConversationContent,
  ConversationScrollButton,
} from '@/components/ai-elements/conversation';

import { Message, MessageContent, MessageResponse } from '@/components/ai-elements/message';

import {
  Tool,
  ToolHeader,
  ToolContent,
  ToolInput,
  ToolOutput,
} from '@/components/ai-elements/tool';


function Chat() {
  const [input, setInput] = useState<string>('');

  const { messages, setMessages, sendMessage, status } = useChat({
    transport: new DefaultChatTransport({
      api: '/api/chat',
    }),
  });

  useEffect(() => {
    const fetchMessages = async () => {
      const res = await fetch('/api/chat');
      const data = await res.json();
      setMessages([...data]);
    };
    fetchMessages();
  }, [setMessages]);

  const handleSubmit = async () => {
    if (!input.trim()) return;

    sendMessage({ text: input });
    setInput('');
  };

  return (
    <div className="w-full p-6 relative size-full h-screen">
      <div className="flex flex-col h-full">
        <Conversation className="h-full">
          <ConversationContent>
            {messages.map((message) => (
              <div key={message.id}>
                {message.parts?.map((part, i) => {
                  if (part.type === 'text') {
                    return (
                      <Message
                        key={`${message.id}-${i}`}
                        from={message.role}>
                          <MessageContent>
                            <MessageResponse>{part.text}</MessageResponse>
                          </MessageContent>
                      </Message>
                    );
                  }

                  if (part.type?.startsWith('tool-')) {
                    return (
                      <Tool key={`${message.id}-${i}`}>
                        <ToolHeader
                          type={(part as ToolUIPart).type}
                          state={(part as ToolUIPart).state || 'output-available'}
                          className="cursor-pointer"
                        />
                        <ToolContent>
                          <ToolInput input={(part as ToolUIPart).input || {}} />
                          <ToolOutput
                            output={(part as ToolUIPart).output}
                            errorText={(part as ToolUIPart).errorText}
                          />
                        </ToolContent>
                      </Tool>
                    );
                  }

                  return null;
                })}
              </div>
            ))}
            <ConversationScrollButton />
          </ConversationContent>
        </Conversation>

        <PromptInput onSubmit={handleSubmit} className="mt-20">
          <PromptInputBody>
            <PromptInputTextarea
              onChange={(e) => setInput(e.target.value)}
              className="md:leading-10"
              value={input}
              placeholder="Type your message..."
              disabled={status !== 'ready'}
            />
          </PromptInputBody>
        </PromptInput>
      </div>
    </div>
  );
}

export default Chat;
该组件将 useChat() 连接到 api/chat 端点,将提示发送到那里,并将响应分块回传。
🌐 This component connects useChat() to the api/chat endpoint, sending prompts there and streaming the response back in chunks.
它使用 <MessageResponse> 组件呈现响应文本,并使用 <Tool> 组件显示任何工具调用。
🌐 It renders the response text using the <MessageResponse> component, and shows any tool invocations with the <Tool> component.
测试你的代理Direct link to 测试你的代理
🌐 Test your agent
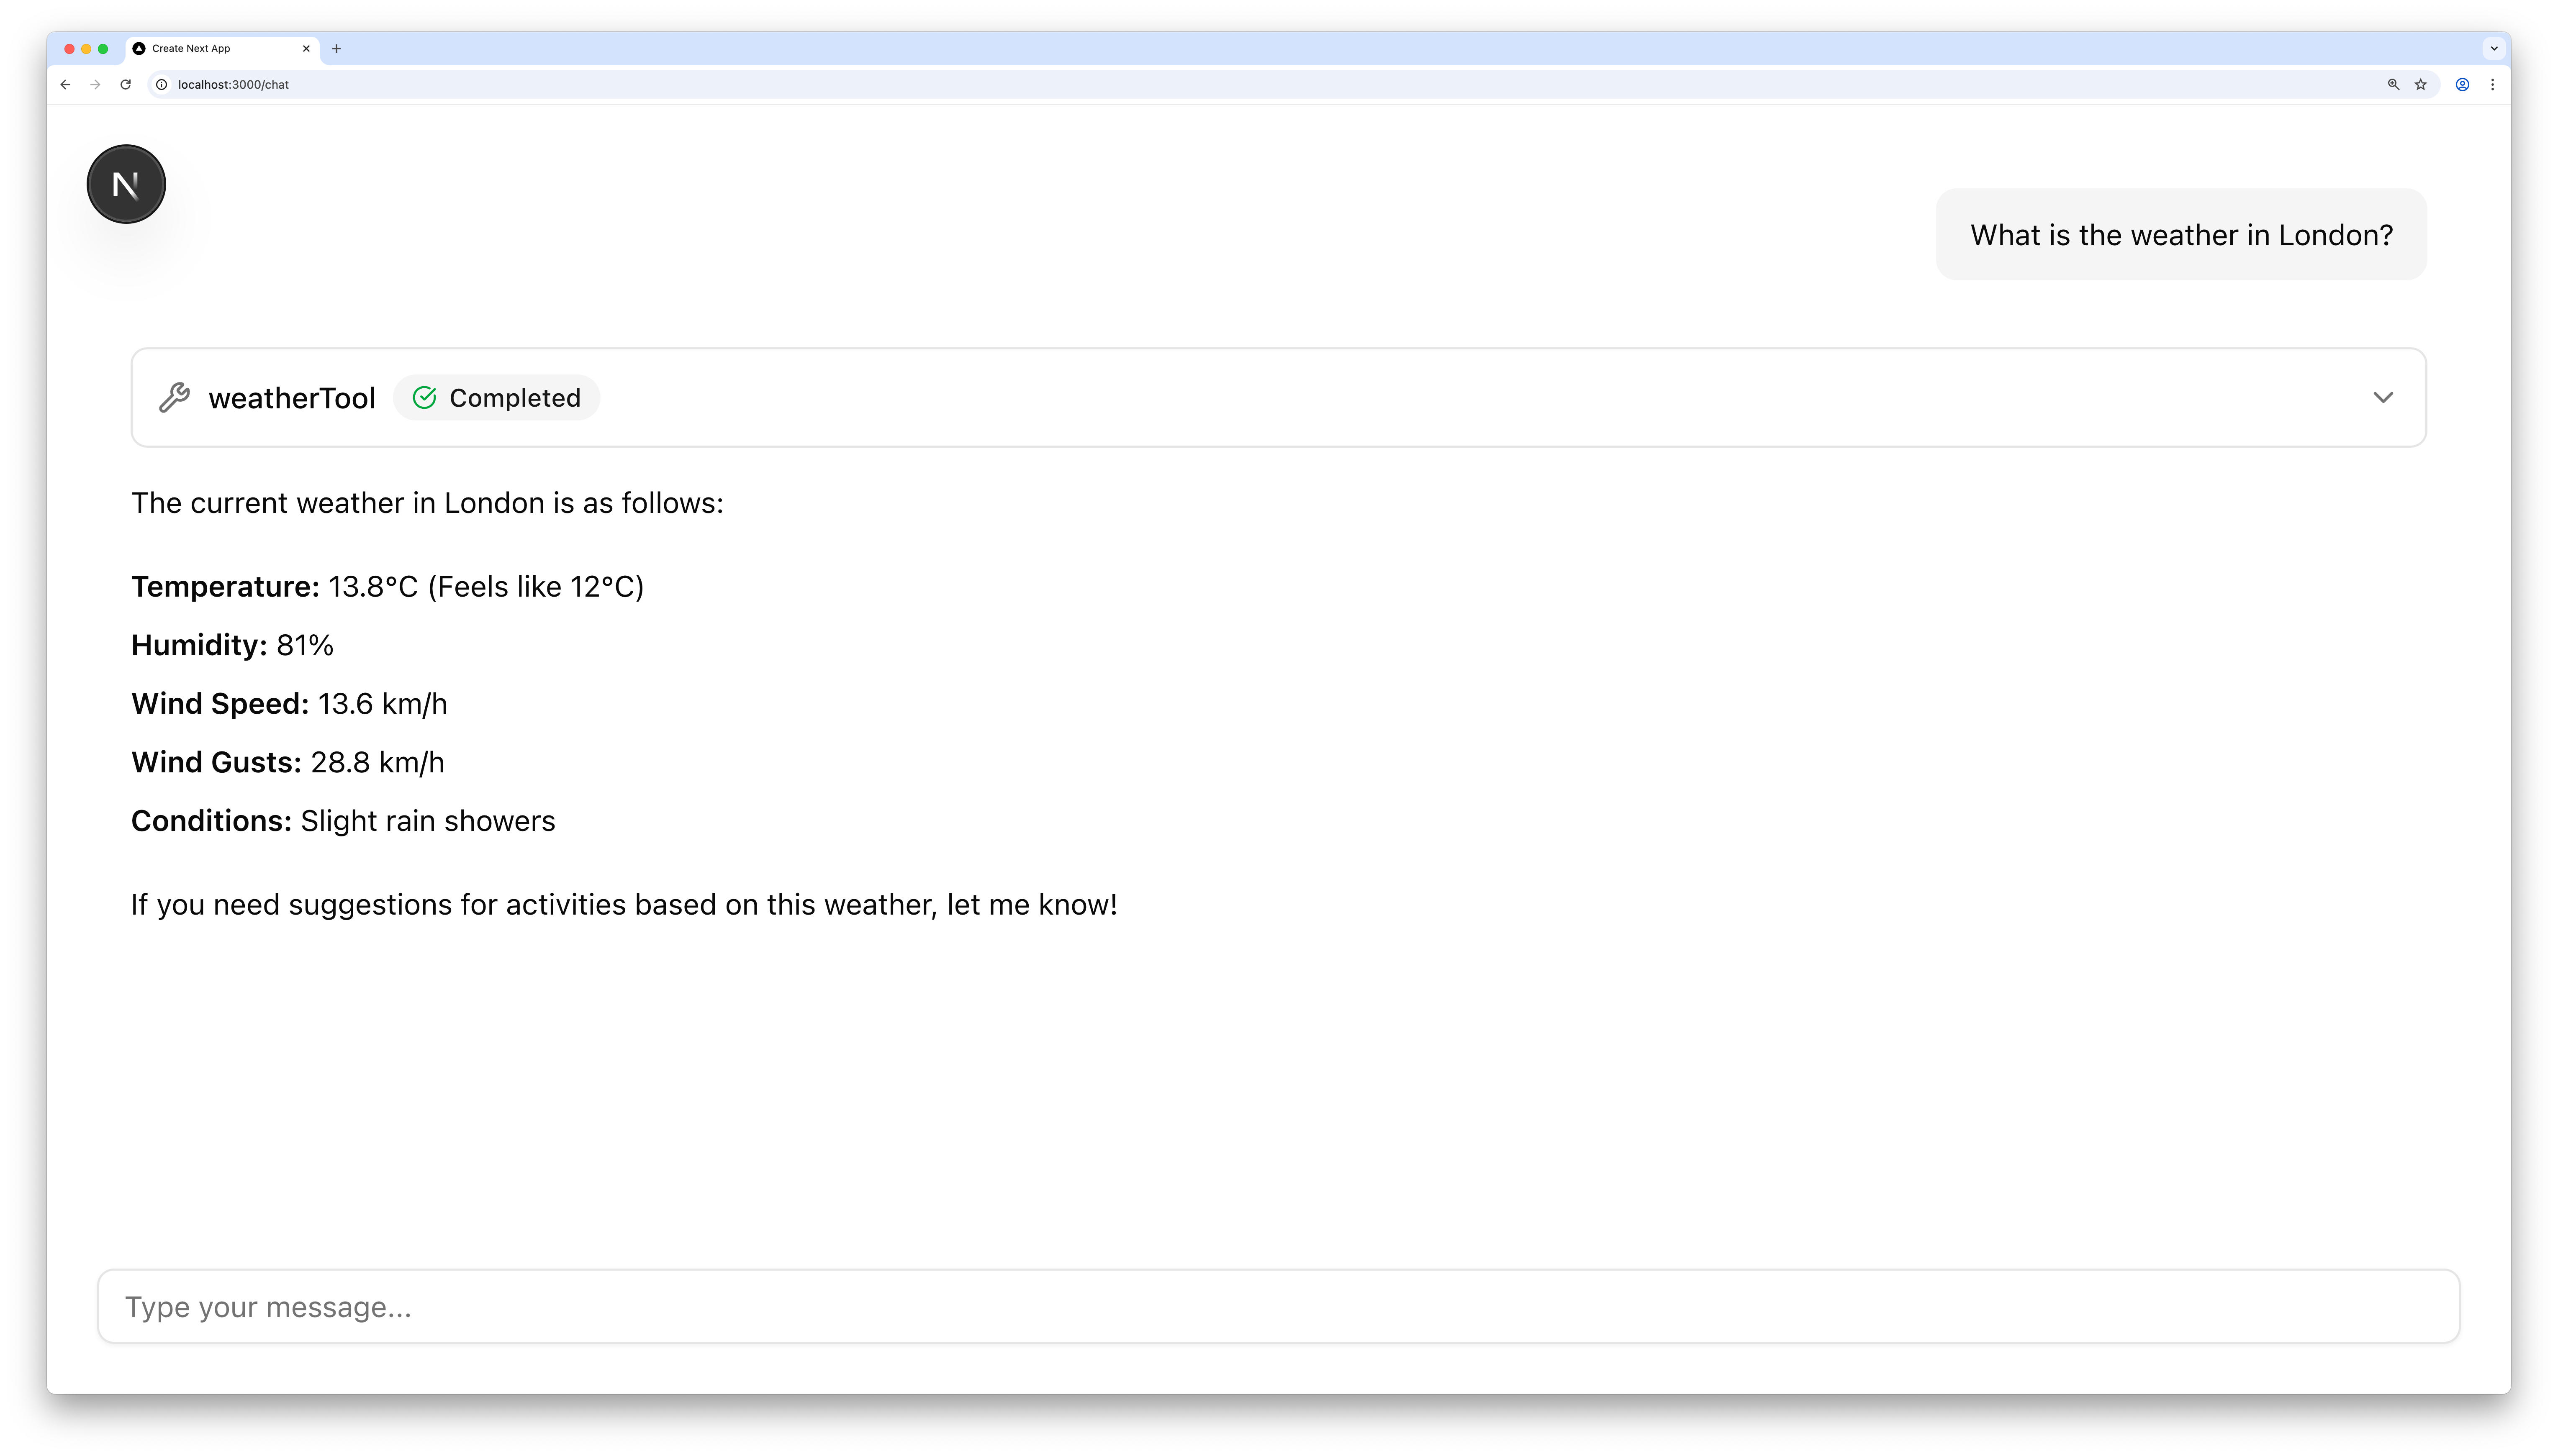
- 使用
npm run dev运行你的 Next.js 应用 - 在 http://localhost:3000/chat 打开聊天
- 试着询问天气。如果你的 API 密钥设置正确,你将会收到回复
下一步Direct link to 下一步
🌐 Next steps
祝贺你使用 Next.js 构建了你的 Mastra 代理!🎉
🌐 Congratulations on building your Mastra agent with Next.js! 🎉
从这里,你可以使用你自己的工具和逻辑来扩展项目:
🌐 From here, you can extend the project with your own tools and logic:
准备好后,请阅读更多关于 Mastra 如何与 AI SDK UI 和 Next.js 集成,以及如何在包括 Vercel 在内的任何地方部署你的代理的信息:
🌐 When you're ready, read more about how Mastra integrates with AI SDK UI and Next.js, and how to deploy your agent anywhere, including Vercel: